Showing posts with label baby clothes quilt. Show all posts

Thursday, 15 January 2015

6 Steps to create the perfect baby clothes quilt

I have had so much interest in my baby clothes quilts I thought I'd put together a brief guide on how to make one for yourself. This will show you how to make a baby clothes quilt with a squares design.

Step 1 - Cut your baby clothes in 6 1/2 inch squares and interface to stabilise


The first step is to get your baby clothes and lay them out to find the most interesting pieces. I use my 6 1/2 inch ruler and rotating cutting mat to find my favourite feature and cut out my square. I look for writing, embellishments, ruffles etc. anything that will create interest in the finished quilt. I then cut 6 1/2 inch squares from light weight fusible interfacing and per the manufacturers instructions fuse to the back of each square. This helps stabilise the fabric when you join them together. I choose light weight as I want my finished quilt to still feel soft and snuggly.

Step 2 - Layout your squares into rows in a pleasing design


I use my design wall or floor and layout my clothes into rows to balance out the colours in the quilt. Don't worry there are so many different fabrics and colours in the quilt it is meant to look scrappy I just make sure that all my pinks (for example) are not on one side or in one corner.

Step 3 - Sew your squares in rows with your sashing

 
For my quilts I chose a sashing width of 1 1/2 inches but chose whatever width you feel comfortable with. Be careful when sewing not to pull the fabrics to much and use lots of pins to avoid stretching and warping. 
 

Step 4 - Sew your rows together with your sashing to form the quilt top
 

Similar to the above be careful and take your time sewing on the sashing strips and pin, pin, pin. The interfacing does help stabilise the fabrics, especially those stretchy ones but as it is lightweight only they is still quite a bit of stretch.

Step 5 - Add your borders


For this quilt I used a boarder cut at 7 1/2 inches wide to frame the quilt. The customer had requested purple sashing so I needed a print to tie the pinks in the clothes and the purple sashing together.

Step 6 - Quilt as desired and add your binding to complete


Till next time.....happy sewing....

xxx Jenny


Friday, 12 December 2014

The Queen Bed Baby Clothes Quilt

 
It seems that once I started offering my customers quilts made with baby clothes I couldn't stop. They are such a special item and so full of memories for the parents and a real keepsake.


I must say I have a love/hate relationship with them. I love creating something so unique and special and talking to the mums about each item and the memories they have......BUT working with so many different types of fabrics can be a quilting nightmare. I do back each piece with iron on stabiliser but in order for the quilt to remain soft I choose a very lightweight one so there is still a lot of stretch you need to deal with when sewing. My trick - go slow...very slow...and pin your pieces....


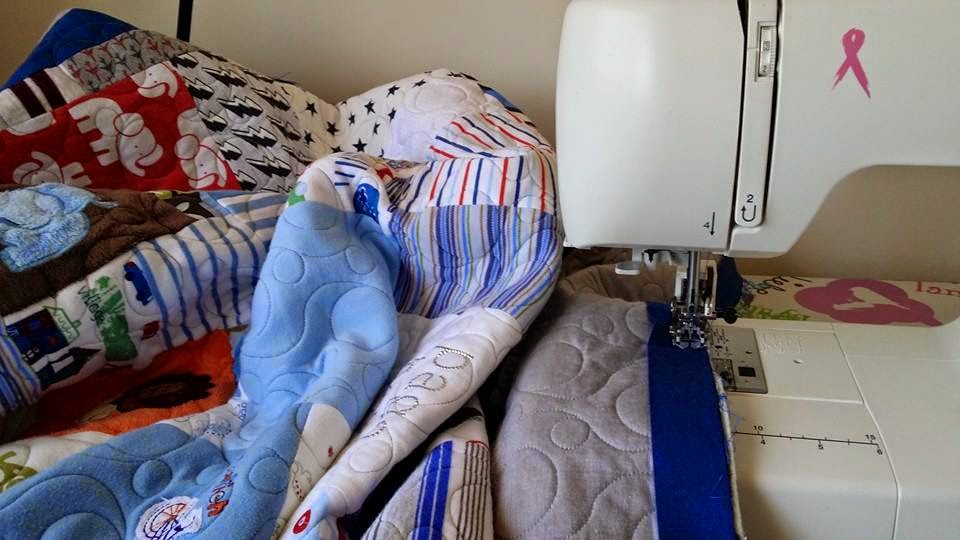
I must admit putting all these little pieces of clothes together is fun and my favourite part of he quilting process is putting the binding on. There is a real sense of achievement at this stage.


To break up the busyness of the quilt I added two plain borders. A smaller border to frame the quilt and a larger one to soften the overall look of the quilt. The quilt is backed with a soft blue flannel and being Queen size is the biggest baby clothes quilt I've attempted and hopefully the last - they just are so time consuming.

 
Make sure you come back soon as I will be posting an easy step by step guide on how to make a baby clothes quilt in the coming weeks !!
 

Till next time....happy sewing....

xx Jenny

Thursday, 12 June 2014

Baby Clothes Memory Quilt - Work in Progress


I have had so many enquiries regarding baby clothes memory quilts that I decided I would bite the bullet and make one and see if this was something I wanted to offer my customers in the future.


Armed with a stack of baby clothes and a 6.5 inch square ruler I began feverously chopping away these cute little squares of clothes. As this is going to be quilted on a longarm I made sure there were no zips or buttons but I did include little pockets as features.


I decided to do a standard style quilt, 6.5 inch squares, 1.5 inch sashing and a 6.5 inch outer border. To help stabilise the various fabrics I also used a lightweight iron on interfacing applied to the back of each square.


These quilts are very time consuming and it take a lot of patience to be careful not to pull at the squares when sewing otherwise it becomes extremely difficult to line up the sashing - I found out the hard way!!


I am really happy with the overall result and am now offering this range to my customers. I had such an overwhelming response to this quilt that within 2 days I had secured 4 orders - wow!! I feel very humbled that I am trusted to take someone's treasured items and turn them into a beautiful quilt. To keep myself sane I decided to only take one order a month and I'm glad I did so I also have time to make some lovely quilts of my own.


I use 100% cotton batting in between and back with a super soft flannel to make them extra cuddly. This one is now off to the quilters and I'm thinking a simple all over stipple would be perfect.

Linking up at Freshly Pieced for WiP Wednesday! 

http://www.freshlypieced.com/

Till next time.....happy sewing.